Introduction
Building a robot is an exciting learning experience in terms of creativity, problem-solving and modern technologies. Regardless of whether you are a complete beginner or you are just interested in electronics and mechanics, it can be exciting, as well as learning, to embark on your journey into robotics. It is now very easy to make a robot come to life by being familiar with the fundamental parts and rudimentary procedures. It is quite easy to follow the instructions provided in this guide, and it is an extremely rewarding process because we will be using really simple yet clear instructions that anybody can follow. And in case you have ever asked yourself how to make a robot, this is the best place to start as a beginner.
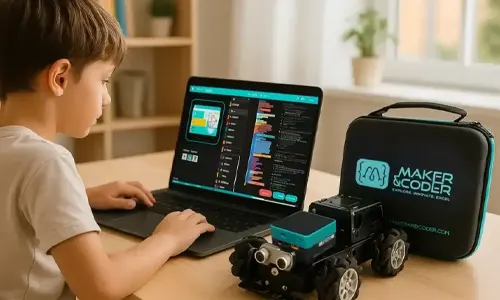
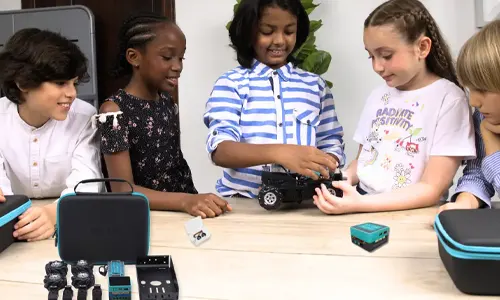
As a hands-on STEM learning experience, robotics is a unique experience for parents and teachers. Children will be able to develop logical thinking and engineering capabilities, and enjoy themselves at the same time. It is possible to learn how to create a safe, interactive, and exciting robot to build among the kids. Inspiring kids in the classes also happens through robotics, which is a marvelous idea. Whether you are searching the ideas on how to create a robot to present in a school project, or want to do something creative at home, you have come to the right place. You will be surprised at how easy it is to make a robot at home, as you will find out by using a few simple materials and tools at hand. The project can give you the pleasure of seeing your robot move, sense, and react to its surroundings.

Step 1 – Decide Why You Want to Build a Robot
The biggest factor before you begin collecting parts or write code is knowing your purpose in wanting to build a robot. Knowing your purpose will aid your design and selection of components as well as the overall direction of the project. Such a question might be answered as–for example, are you trying to make a fun toy, or something educational, or are you trying to make a machine to do something? Understanding the “why” helps you to remain focused and not be overcomplicated. Be it to explore as a hobby or to technically enhance your skills, knowing your objective will set you up and make the whole process easier and manageable.
When you want to know how to build a robot as a school project, it shows that even more critical is the decision concerning the purpose. School projects can have a set of guidelines, time-constraint and educational aims. You can plan by determining whether your robot ought to show movement, sensors or automation. This clearness can assist you in selecting the set of appropriate materials, budgetary planning, and meeting your time limits. Note that the more determinant you are in purpose, the simpler it is to design, assemble, and program your robot. In the end, a clear purpose behind your project will maintain your motivation, allow you to solve issues with maximum efficiency, as well as create a great final product that is usable and spectacular.
Step 2 – Choose the Right Type to Build a Robot
When deciding to build a robot, among the most crucial decisions that you will make is the type of robot that you should make relative to the aim that you have, the level of skills that you have, and the amount of resources that you have. There are a variety of different robots—wheeled robots, which move, robotic arms, which are precise, and humanoid robots, which are more complex to interact with. All of them have their learning curve, and knowing what you want to accomplish will assist you in eliminating your options. Simple wheeled robots are also easier and simpler since they help beginners to get quick solutions to encourage them.
When seeking advice on how to build a robot to use as a school project, you should take into account a design that is easy to make and yet creative. As an example, a line-following robot may be used to instruct not only mechanical assembly but also basic programming without losing its status as an incredible classroom demonstration. In the meantime, creating a robotic arm may become one of the best options in case the scope of the project involves the idea of demonstrating control and precision. You could even use a small, inexpensive one at home that will be made out of recycled materials and thus both entertaining and economical. Choosing the most suitable type at this point will make the remainder of the construction go smoothly and achieve the robot according to your ability and the requirements of the project.
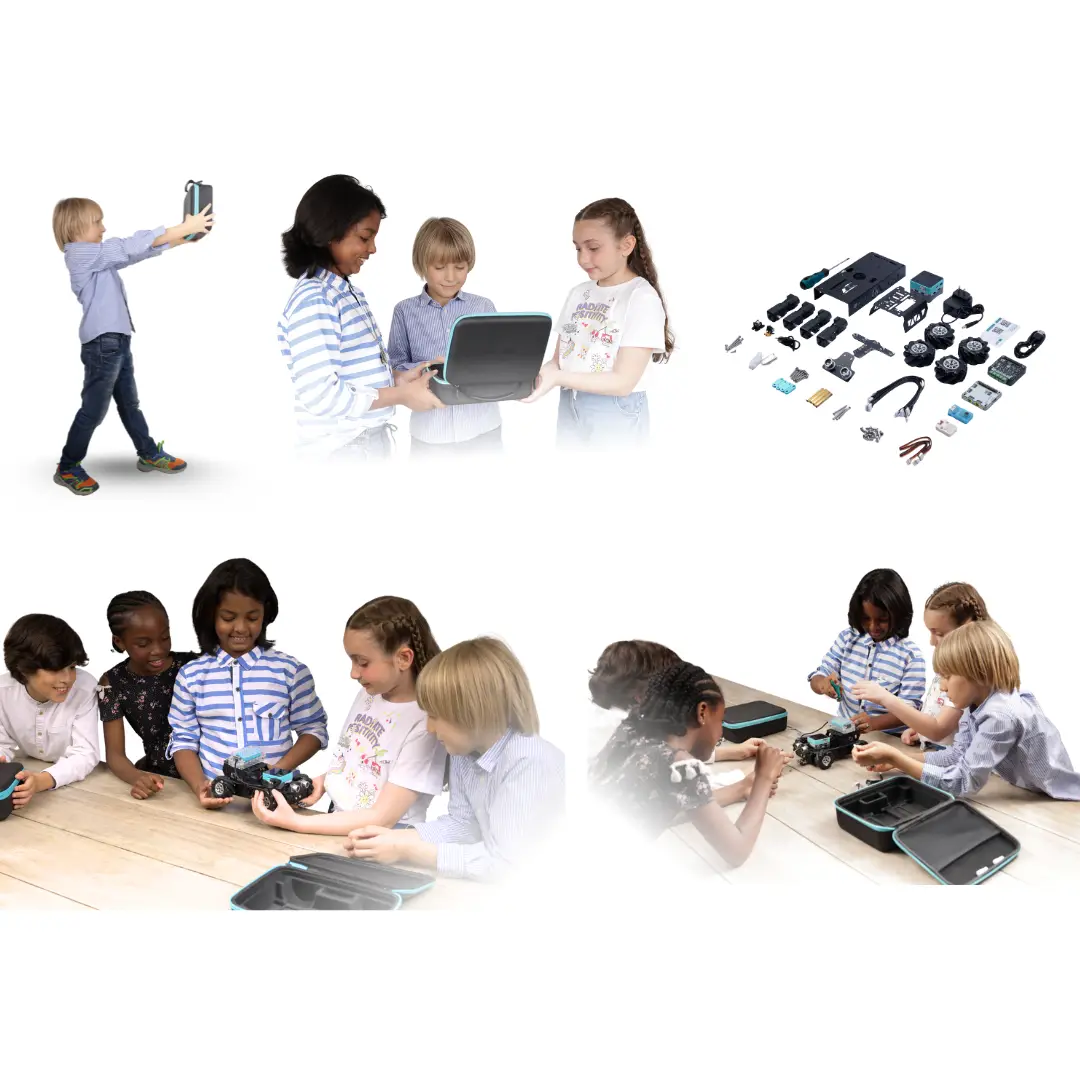
Step 3 – Gather the Parts You Need to Build a Robot
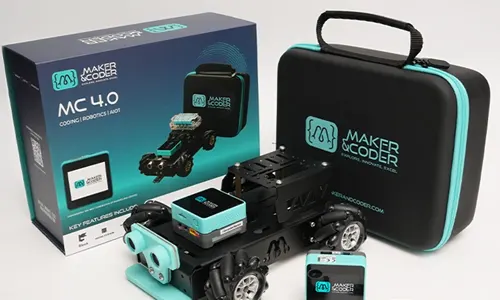
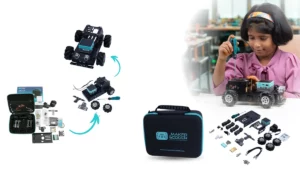
When you intend to build a robot, you have to get the appropriate parts once you have determined what you want it to do. Specific bits and pieces will vary, depending on the nature of the robot you are building- but any basic project will include a chassis/frame, some form of locomotion (wheels, or legs), movement (motors), the ability to sense and process the world most will feature motors, a microcontroller-based circuit board such as Arduino or Raspberry Pi, and the capacity to navigate (sensors), and a reliable power source. Jumper wires, screws and breadboard are also always useful as they can be used as a connection means. When you select quality components, you have a robot that will perform better, and when the time to troubleshoot comes again, it will become easier to do.
As you consider how to build a robot as a beginner, the best thing is to find a simple kit in the market that has all the simple parts assembled together. This eliminates time, decreases the possibility of compatibility problems and allows you to concentrate on what you are learning (assembly and programming) instead of scouring the web to find single components. Some individuals can even adopt this stage as one of the steps involved in how to build a robot at home projects using cheap and accessible materials. Collecting the right pieces between the time you sit down and begin building also allows for an easier setup and an overall more successful robot.
Step 4 – Pick the Best Microcontroller to Build a Robot
When you embark on building a robot, the kind of microcontroller you will use will become the brain of the robot, as it will be the one that will be used to control the sensors, motors and whatever it is that the robot is programmed to do. As a starter, the most popular and well-documented are Arduino, Raspberry Pi and ESP32. Arduino is ideal when it comes to simple robots that are sensor-dependent due to its simplicity of use and massive online following. Meanwhile, Raspberry Pi also has better capabilities to perform complex tasks such as image manipulation or even AI implementation. The ESP32 is very suitable when you require Wi-Fi or Bluetooth connectivity to be implemented on board. You will choose according to the complexity of your project, budget and learning objectives.
Whether you are researching how to build a robot as a school project, microcontroller selection must also reflect resources, programming skills and compatibility of components. As an example, Arduino kits targeted to students are commonly available, and the kit may come with parts simple enough to be operated by entry-level hobbyists and with step-by-step guides to the kit. Proper selection of a microcontroller will ease programming and the wiring of the project, and make provision for an upgrade in the future. Never purchase without having a look at user support and instructions. Choosing a microcontroller wisely at the start of your robot project will also mean that your robot will run well and achieve your project objectives, whether fun, education, or invention.
Step 5 – Design a Plan to Build a Robot
It is critical to strategize on how to build a robot before grabbing your pliers and beginning to cut wires or glue wheels. A fine plan serves as your blueprint, and every movement is directed right to the put-together parts and the final programming. The first step is to determine the purpose of the robot: to move, pick objects, and follow a path. Then make a sketch on paper or a simple CAD program to see how things will fit together and the length of wires. This planning will help in making the correct material choices and avoiding some expensive errors in the future. Consider how to distribute the weight, position motors and which sensors to peg to get maximum performance.
Once you are thinking about how to build a robot as a beginner, your aim should be simplicity. A basic design should be avoided, which can only be done with advanced skills in the first place. Rather, concentrate on a simple motion or simply one attribute. Divide your plan into small chunks, such as assembling the chassis, wiring electronics, and creating simple code. Note also the tools and workspace available to you- even in the smallest space, a tidy assembly will be easier. Bear in mind that it is not only the time that a good plan saves; the building process becomes easier and more fun, and you will have the chance to succeed in the first robotics project.
Step 6 – Assemble the Frame to Build a Robot
As you progress through to the assembly-of-the-frame step, you are making your design a reality. The frame provides the support to all the other components, like the bones of a skeleton, and thus must be sturdy, balancing and well-positioned. The first thing to do in order to build a robot is to put your chassis components on any surface that is flat. In case you have a kit, follow the instructions that come with the kit. In DIY, you can use aluminum, acrylic or even thicker cardboard, depending on what your project is being built to do. Make sure that all the components are precisely measured, and if parts are screwed, bolted or fixed together with glue, there are no loose joints that can impair movement.
This step is thrilling as well as vital to anyone who may wish to know how to build a beginner-level robot. Start with a more basic design like a rectangular base so that it would enable the attachment of wheels, motors and sensors at a later stage. In case you come up with a mini version, such as a small robot that suits sitting on a desk, the weight of materials will facilitate the movement. When tightening connections, it is always a good idea to ensure that everything is in line because placing them slightly off can alter the overall stability of the robot. After the support structure has been fitted in place, please give it a slight test by pushing or flexing… make sure it is strong enough to bear the mechanical and electronic parts in the steps to follow.
Step 7 – Install Motors and Wheels to Build a Robot
Installing the motors and the wheels is among the most important things when you are building a robot to make your creation come to life. Wheels make the movement smooth, and motors drive the movement’s power. The first one is to get a suitable motor. DC motors work best with basic robots, and more precise motors are available, such as servo or stepper motors. Fit the motors on the chassis securely, but be sure that the alignment of the motors is right, or the robot will walk crooked. You will then mount the wheels to the motor shafts, ensuring that they are not loosely fitted, which may cause them to slip. Attach them with screws or adapters where necessary and make sure that there is smooth functioning in rotation. This step will determine how straightforward your robot is.
Motor and wheel installation. As students learn how to build a robot from scratch, this is one of the most enjoyable and instructional things to do. Place your motors strategically to ensure the balance, and make sure you put lightweight but tough wheels so that you can control them better. When you are working on a mini-project, say a school robot, you may desire to use geared motors that generate incremental torque. After installing, your motors should be connected to your controller and, through a simpler program of testing, have a test run of forward motion, backward, and turning movement. A good motor and wheel assembly guarantees that your robot will move around confidently in any surroundings.
Step 8 – Add Sensors to Build a Robot That Can Interact
In the construction of a robot, it helps create the feeling and vision of the surroundings around the robot, and this is what sensors offer to it. Your robot would go blind without the sensors and cannot respond when something appears in the path or to any other change in the environment. Typical available sensors include ultrasonic sensors to detect distances, to follow the line, infrared sensors and light sensors that can detect brightness levels. The equipping of the appropriate set of sensors will also depend on the purpose of your robot: navigation, detection of objects, and interaction. Placing sensors properly is equally necessary as their choice since it helps to provide correct readings and is compatible with comfortable operation.
When you learn how to build a robot as a beginner, it is also an exciting stage to incorporate sensors into your project, since it will make your robot interact with the environment. An example would be adding a touch sensor, which would make the robot react when touched, or a temperature sensor to respond based on the temperature levels. Connecting them to your microcontroller and simple code to read the sensors will get you responding behavior immediately. The key is to do testing as much as possible: play around with sensor placement and angles so as to achieve the most consistent outcomes. The proper sensors will allow your robot to interact with the world in a manner that can help it become smarter and simply more fun to use.
Step 9 – Program the Code to Build a Robot That Works
Programming is the stage in which your composition is brought to life. Upon completion of the hardware, you are then required to build a robot that can take instructions and also respond to its/environment. Then find the correct programming environment depending on your microcontroller, Arduino IDE in the case of an Arduino board, or Python in the case of the Raspberry Pi. Start by using simple movements such as forward, turn or stop. Next, combine sensor data to allow your robot to respond, e.g., to avoid obstacles or follow a line. Test each of the functions in units and then bring them together as a complete program. This will expose problems early enough and make performance run smooth.
As is the case with building a robot as a beginner, ease your way into the first program. One can use sample codes of reliable sources or alter existing sample codes to determine how individual lines work. Over time, you can be able to test high-end functions such as voice control or use of Bluetooth use. At least keep your code in documentation, and make alterations to be able to troubleshoot or make later alterations in your design easily. Programming is not only moving around your robot but also teaching it to think, react and adjust. Practice makes perfect, so your coding abilities will strengthen, as well as your robot, as time goes by.
Step 10 – Test and Improve How You Build a Robot
The last part involves testing and refining your design once you complete assembling and programming. Testing is to make sure all the components work as they should, including movement and the accuracy of the sensors. When creating a robot, it is always advisable to get the machine to perform basic functions by running tests. Look at how it responds to commands, responds to obstacles, or performs programmed routines. When it is not working, solve it step by step: inspect wiring, connections, code logic and make corrections. Minor corrections are usually major factors in either performance or reliability.
The process never ends. Take notes of experiences that come out of testing to ensure that you have a way of addressing them. And some upgrades–adding more sensors or better wheel alignment, for example–can help speed things up when learning how to build a robot for beginners. When testing, in case you are working on a project, do so in an environment that is comparable to the one under which it would work. An example would be in case your robot is to be demonstrated in a school, practice on similar floors or environments. And, promote creativity as well- experiment with new programming routines or mechanical adjustments. The more you work out and fine-tune, the more efficient and capable your robot will get, and you will see yourself shifting to the stage of the polished, high-performing machine.
Safety Tips When You Build a Robot for the First Time
Safety is the first thing to consider when you build a robot for the first time. Electronics, sharp objects, and the anatomy of things that are moving are dangerous to venture into without taking the necessary precautions. First, it is always required to read the manuals of your equipment and parts. Use safety clothes that can protect your eyes in case of a solder splash or pieces of flying debris, like safety glasses. Keep your working area tidy; wires and other tools will have an orderly setup, and prevent any accidents. In case of electrical parts, do not make efforts to do something without properly learning; rather, seek the assistance of someone knowledgeable. Slow and cautious steps will help avoid errors and injuries.
In the case of people studying how to build a robot beginner, using low-voltage projects lowers the chance of being shocked. When starting on electronics, avoid being alone- a friend, teacher, or someone to guide you is in order in case of emergency help. When engaged in soldering, practice it in a place that is well-ventilated so that you do not inhale fumes. Do not allow liquids to get into electrical components, and a second inspection of the connections is worth undertaking before turning your robot on. Above all, be patient; rush will make you make dangerous mistakes. Not only will these tips help keep you out of trouble, but they will also help the robot-building process go more smoothly, be more fun, and successful.
Final Thoughts on How to Build a Robot Successfully
Making a robot does not only mean sticking parts together, but it would entail comprehending the dynamics of the mechanical parts, the electronics and the programming. At first, the process can set in as overwhelming to beginners, but it can be broken down into more manageable steps, such that it becomes achievable and enjoyable. Set a specific target, get the appropriate resources you need and most importantly, take time to learn the basics before using other advanced applications. It is worth reminding that the following skills are as crucial as technical ones: patience and persistence.
Trying to find out how to build a robot for beginners always means selecting those robots whose designs are rather easy, so that one will not have to feel restricted when trying to come up with experiments. This may be a mini-wheel robot or a rudimentary robot arm. Depending on your experience, you can include sensors, wireless controls and even features that use AI capabilities. The process of constructing a robot is educational; each error brings with it an experience that is worth it, and each optimization increases your confidence.
No matter how you might be building, be it just for fun, education, or competition, you should always experiment and innovate. Share your experiences in online robotics folders, ask for advice, and learn through other people’s experiences. When you practice more, your robots will be better. Ultimately, the finished machine is not the ultimate reward, but the skills, creativity, and problem-solving abilities you will have learned along the way.